(scroll down for the "after" pictures!)
The D and the M in DM Irish Building and Design stands for Dan and Mindy Irish. We got our start in Real Estate in custom home building in 2004. Dan earned his Real Estate license as a Realtor® in 2007 and in that time we did our first "Flip" with my brother Todd. It was a tri-level home in Carmel that needed some loving, and upon entering initially it had smells and stains that I'd never encountered. 35 days and 3 dumpsters later, we had a fabulous property ready for its buyer! As a General Contractor, I fell in love with the process of bringing a home back to life and knew this was a path I wanted to travel.
The D and the M in DM Irish Building and Design stands for Dan and Mindy Irish. We got our start in Real Estate in custom home building in 2004. Dan earned his Real Estate license as a Realtor® in 2007 and in that time we did our first "Flip" with my brother Todd. It was a tri-level home in Carmel that needed some loving, and upon entering initially it had smells and stains that I'd never encountered. 35 days and 3 dumpsters later, we had a fabulous property ready for its buyer! As a General Contractor, I fell in love with the process of bringing a home back to life and knew this was a path I wanted to travel.
Eden Estates, Carmel in 2007
 Fast forward five years and many projects later, now the summer of 2012, we're taking on another diamond in the rough. Located in McCordsville, yet in HSE Schools, it has amazing potential to be a fabulous home! This will be our biggest renovation yet as we tackle new baths, flooring, a new kitchen, paint, lights, and exterior features. Stay tuned to this recurring post as we continue to highlight the picture progress and renovation tips we'll offer along the way. Join us on the journey and let us know when you're up for your next overhaul project!
-June 10 thru 30-
Monday, June 11-
-Met with the kitchen designer to talk design and materials. We're going with an antique white cabinet with a simple profile. Here's my inspiration. Don't recreate the wheel...always have an inspiration!

Wednesday, June 13-
-I schedule as many subs as possible in one visit and this week I was on site in a 3-hour window going over specifics (called specs) with those I've invited in to give me a bid. In one visit I'm welcoming in subs for painting, flooring, cabinets, trim, demo, and electrical....7 contractors to be exact. It's a great chance to walk and talk the house, answer questions, and take minimal time on site and trips over by meeting with as many people as possible in one afternoon.


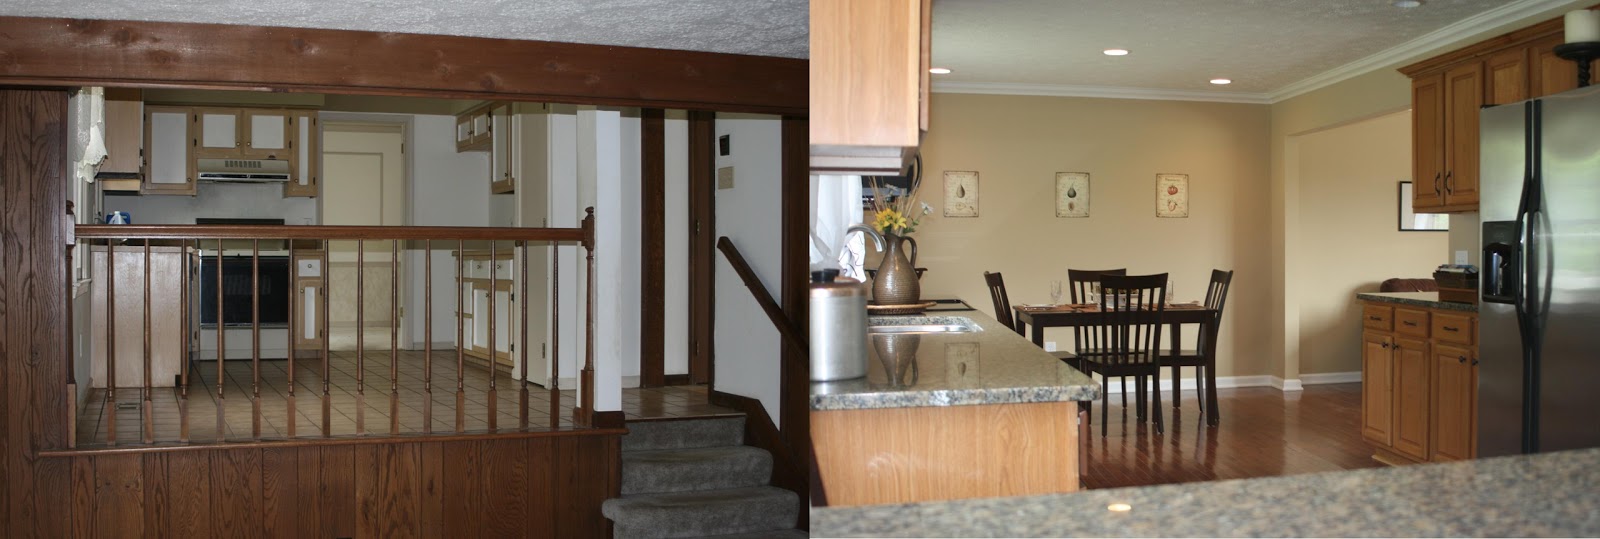
Kitchen (and Family Room in back drop) BEFORE!
Friday, June 15-
Met with three more contractors to talk interior and exterior features. Bids are coming in from Wednesday's meeting and I'm plugging those numbers into my spreadsheet that sets my project budget. If the bid is too high, I have to keep shopping. Additionally, as I demo one area, say the master shower for example, you realize that it takes a lot to put it back together. Plumbers to set the drain, tile for the walls and floors, and plumbers back again to set the wall fixture and shower head, and then don't forget the shower door. If your budget allows, it's worth it, but some items have to be evaluated thoroughly BEFORE they come out! Touch one thing, repair and replace five!
TIP: When talking with vendors and subcontractors always ask: What is your lead time? Are your prices negotiable? What forms of payment do you take? Who does the actual work? How long will the job take? What is your warranty? The more you know the better...be educated!
 Great find at Lowes tonight! We always walk the damaged/discount area and tonight we found exactly the fridge we wanted! The "damage" was on the handles and won't be noticeable at all in our home. Here's the trick....we made an OFFER at Lowes! You simply get a sales person, tell them you'll offer x amount on the tag price, and ask them to present it to a manager. In this market, everything's negotiable. We offered $1500 on a $2000 discounted price and they countered at $1800...still saving us $200 off the tag price and $600 off the new ones on the floor! All you have to do is ASK!
June 17 thru 24-
I met many more contractors on site and problem solved. In new construction, it's all new. You can see what's behind the walls because you put it there! In renovations, you're uncovering the past. In our quest to open the floor plan and take out a wall, I had a feeling there was plumbing in the wall...and sure enough there was! Taking a wall down is a great idea, but it leads to an added header, the removal of an electrical outlet and an old-school speaker system, and the relocation of water lines on an adjacent wall. Think first, act second before you start to tear it all apart! One thing leads to another and the $$ signs add up FAST!
All in all, it takes a massive amount of administration to find contractors to bid the job, meet them on site, organize their specs to bid, and then negotiate a price once a contractor is selected. Then don't forget about making the selections of what to install and then coordinating the schedule of who comes in when and in what order. Get your calendars out and keep a pencil nearby, or in my case, keep your iPhone charged for all the appointments, notes and changes you'll be making!
TIP: We order as much as we can online because there are great deals on products and usually free shipping out there. We have trade discounts at places like Restoration Hardware, Pottery Barn, Williams Sonoma, Bellacor, Home Decorator's, Kirkland's, and more. Shop wisely, shop on your schedule (they're open 24/7!), and pull your home together via the computer.

 If we don't purchase online, Lowes is usually our spot of choice for random items like yard supplies, faucets, toilets, tubs, you name it! TIP: We always shop there with a 10% discount coupon and Dan would love to send you one if you need it! Email Dan Here! Every little savings amount helps!
Monday, June 25-
 Shopping for granite...one of my favorite stops! On this trip I was quite overwhelmed with the project and it was hard for me to make a selection. After two trips, I still wasn't sure of my choice. My resolve...to WAIT until the base cabinets are in so I can get a better feel of the space. Deciding to let the kitchen "talk to me" was better than buying the WRONG color and then being sorry down the road. I had to be willing to let 10 days slip away on my schedule and maybe go a few days while living in the home without counters, but in the end it's the wise thing to do. NEVER buy on impulse! TIP: on this trip, I had my cabinet and back splash samples, as well as my wall colors and a picture of my flooring on my phone. It was the best way I could let the elements of this space come together to help guide a counter top decision.
Wednesday, June 27 thru 29-
 We're firming up bids and getting organized before demo day on Monday, July 2! Our current garage in our rental is being used as our storage unit. As our online purchases arrive (I love the UPS man!) and as we collect goods for install, they wait for delivery to the new home. Right now, I'm calling this the calm before the storm! .

We started the crew in the master bath because plumbers and tile are close behind on the agenda this week. Out came the jetted tub, and down came the closet wall. What was once a small, closed-in bath now looks like this......


Open and a clean slate! A new tiled shower will sit in the far corner. A claw foot tub will rest under the window, and a newly framed wall will pull back into the closet, still leaving ample closet size. Plumbers come in soon to relocate the plumbing based off the new plan.


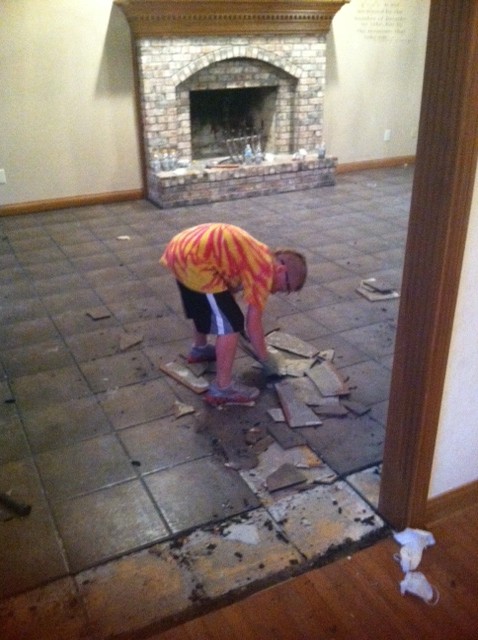
After the two upstairs baths, we moved on to the kitchen. Opening the wall between the family room and nook was important to us and we knew a water supply line lay hidden in the walls. Relocating that is worth the gains. Our jr. demo crew was front and center on taking this wall apart!


By end of day, the cabinets (and some of the hardwood!) had left the building and the wall was in its final stages. Only show up if you can sport your eye glasses, face mask, and camo demo gear!!

TIP: A quality shop vac is your best friend on a job site! Get one that sucks. No, I mean it....one that has great suction! This one was put to great use many times today and we won't leave home without it!!


So remember my tip to list your old items on Craig's List? Your old can be someone else's new! Here I had buyers already (on day 1!) for some of the appliances and different buyers for all of the kitchen cabinets. They get a great deal. I get cash on the spot and more garage space and more room in the dumpster. Reduce, Reuse, Recycle!!


On the DIY Network they run a show called, "Renovation Realities." It's all about the good and the bad of pulling apart and putting a home back together. Today's DM Irish Renovation Reality was the bad water main shut off to the home. We didn't realize it was bad until the cabinet base tried to come out and we had our own little indoor spring flooding the kitchen floor. Mr. Plumber came to the rescue to diagnose and solve our problem. We took a small detour, but it didn't have too bad of an impact. However, water running loose in the home is NEVER a good thing! Problem solved. Disaster averted.

Our demo team has been with us on well over six projects. They are the hardest working crew in town. We so appreciate Bill and John and feel blessed to have them on another job. We got so much done today, these guys started in on the tile floor demo, too. It was the loudest part of the day, but it's got to be done. Our jr. demo team worked from 10AM to 10PM with smiles and inquiring minds. We're more than pleased with the progress and work ethic of our crews today!
July 2-7, Week One!

Day 2 brought even more demo and the arrival of the plumber. Each subcontractor is purposefully scheduled based off of the upcoming needs of the next contractor and the order to install the materials back into the home. The plumber got the head start because tile was close behind and all rough plumbing work had to be in before tile could proceed and drywall repair could be completed.
 TIP: We took a single vanity area and had it transformed into a double vanity station. It was a small investment with a big resale return. Always have an open vision when planning a redesign!
Look what we found when we demo'd the pantry.....a hidden hvac vent duct. Ummmm, hold up! A cabinet's going in that space! Another hurdle to jump, but we figured it out!
Striking a power-tool pose!


This was a very holey day! We opened the floor in the master bath to rework the new tub and shower layout and we also had to repair some damaged floor boards above the kitchen from a previous hall bath toilet leak.


The job site on Day 4 was hopping. HVAC, Plumbing, Demo, Electrical, Foundation, and Framers filled the home. (I love a busy and productive job site!) Stay clear as the cast iron tub ascends to the second level.
(PS...I don't want to be the one to tell this crew there's a claw foot tub coming soon, too!)

and the show must go on! We set up our "office" so Dan could do Real Estate and I could monitor the schedule, budget, and update my recycled items postings on Craig's List for resale. Unfortunately, after the extreme hot temps outdoors and us not running the AC yet indoors, my computer overheated and ended up in the shop. It's quite hard to run a reno job without your computer, but hopefully I'll get it back soon....fingers crossed! TIP: have your budget, agenda, and contractor list on your iPhone or a print out sheet. This will help you if your computer blitzs like mine did!


and there's the outside, too! Beds needed cleaning and bushes removed. By the end of Day 2 our dumpster was filling up. Before we began I questioned if we needed a 40-yard, thinking "I doubt we'll fill it!" Now I'm hoping we don't have to get another one! Plan for lots of debris, boxes, and general scrap. It stacks up quickly!
TIP: I was shopping for brackets to create a laundry shelf to replace the oak cabinets I sold. I could have bought the 2 2-packs of decorative brackets for a total of $20. Instead, I chose a more industrial look using the gray brackets for $1 each and a can of spray paint to change them to my desired color. ( I recommend Rust-O-Leum in the easy spray nozzle..flat black or oil rubbed bronze!) Spray paint is your renovation friend. Salvage old and make it new in any color you want and save some $$, too!


Nearing the end of the week, we had made great progress. The transformation is beginning to reveal throughout the home. A wall was removed and braced in between the family room and kitchen. In the master bath, a shower wall and closet wall were removed to enlarge the space. A new look is coming soon!


My favorite part to all of this is that we are renovating our home as a family. My oldest was 14 months old when we got into the industry and we LOVE that they are growing up in the dust and hub of the activity. We're having a ball doing this with our kids in tow. Someday, they'll each get a house to manage and renovate and although they don't realize it at this moment, we're teaching and modeling for them now what we hope they will someday desire to do, too!


July 9-15, Week 2: This was a week of cleaning up the mess. All the trades inclusive of electrical, plumbing, drywall, and tile got down and dirty on the job. It was not a pretty site, but our vision for the finish line was in view and we knew where we were going....dust and all!

The roosters were leaving the building! After my ambitious attempts to "quickly" remove the wallpaper throughout the home, my hired wallpaper remover pro came to my rescue! SO worth the cost for that assistance...I was going a little looney doing that! At least I can say I tried it!


Note to self (and you!): ALWAYS put tile down on backer board or underlayment, however you choose to call it. Putting it down directly on the sub floor is not a good choice, ever. Black grout and mastic were all over the place and shoved up under the baseboards. The dust billowed out of the home as the hardwood guys came to prep the floors for the following week. What a huge mess!


This beast of an entry light was our target! Hanging from the beam located 25 feet in the air, we had to build the scaffolding up to go after this light. Dan climbed the tower and worked quickly and carefully to welcome the new light. Fingers crossed the bulbs don't need changed anytime soon!

My all-time least favorite part is drywall. It has tons of steps and it's super messy. I know it's crucial to a finished look, but that drywall dust gets everywhere!


Still part of the prep, but a little bit of the fun and pretty, Dan installed some of the wall slats in the powder bath and my trim carpenters set the apron-front farmhouse sink....my first time to use one of those!


TIP: You can save some bucks by salvaging the existing floor vents and using your friend and mine, spray paint, (in your color of choice) to give them a clean new look. We chose Oil Rubbed Bronze on this house. Simply rinse them down before hand, spray on cardboard outdoors, and let them dry between 2-3 total coats.
TIP: Always get your hardwoods delivered to the job site at least 2 days prior to install so they acclimate to the moisture content in the home. The ideal is to have the sub floor and hardwoods be within 1% of each other prior to install. This helps prevent cupping and warping in the wood.


The tile in the home was on the walls, the showers, and some on the floor of the hall bath. It's a work of art and great detail work laying and cutting it piece by piece. This craft took the longest in the home, but it's worth the wait! Contact Mindy Here if we can get you in touch with our flooring gal Amanda!

I used my iPhone for taking notes, but since we did this job so quickly, I had to yank my chicken-scratch clipboard back into effect and pay constant attention to my scope and sequence with my subcontractors and scheduling. It may look messy, but it got the job done!

Communication is key. In case you missed that, communication is key! Here my tile gal is working out the details with my glass shower door contractor. Measure twice, cut once. We have to get it right and be in constant communication with everyone as the job proceeds. Otherwise we're wasting time and money.

The details make the difference in any job. Lighting is a detail that we like to pay great attention to. Can lights really add to the clean look of a space, they're timeless, and easily out of the way in any design.


So where are the kids in all this mess? In the mess! If they're not at the sitter or camp, they're not missing a beat. Thrilled to ride their bikes indoors (NOT after hardwood floors for sure!) and overjoyed to pick up a paint brush, they LOVED to help!
July 16-22, Week 3...bring on the pretty (and the surprises)!
Let the good times role! It was that time to spruce this place back up and put it back together. This is the fun part we've all been waiting for! Keep in mind that all selections were made and ordered weeks back in late May and June in selection appointments with suppliers, online, or in local stores. TIP: Always have your supplies waiting on you, not you waiting on them!


In go the hardwoods! We had a full crew of 10 guys laying the floors and they got it done in one day's time! It was amazing to watch them work. They had to work efficiently because the painters were in the line up for the next day!
I felt like I was in a movie. Flooring guns and loud Mexican music were echoing thru the home!


After a Mindy Irish "I can paint this whole home with four kids running around" one-day try and fail, I had 16 painters (yes, 16!!) fill this home and knock it out of the park! Starting at 8AM and completing by 3:30PM, this home was splashed in all types of colors! We have our favorites and our colors that truly feel like "home" to us, so we stay with our top colors from Sherwin Williams such as "Macadamia", "Dapper Tan", and "Acorn Top". We also love our Restoration Hardware "Silver Sage", "Sea Green" and "Blue Sage" colors as well!


Now we're talking...cabinet time! The base cabinets were actually set a week earlier so hardwood floors could get in around them. We had to hold on the uppers so drywall could finish, but in due time we got those in. The bells and whistles of the trim and crown molding of the cabinets are coming soon in Week 4! These are painted Antique White in a Benton door style from Aristokraft. Email Mindy Here to get connected with Lauren our cabinet gal! We are also SO very pleased to find this crew of trim carpenters. They have great skills and do wonderful work!


Granite hit the scene as well and we are always fingers crossed and one eye opened as that goes in. We have amazing confidence in our supplier, it's just that we had a really hard time landing on a granite this go round. After much indecision, we went with "Juparana Gold Light", although it has no gold in it! I wanted something with a white base for a light and airy look in the kitchen...and it is the perfect choice! Granite can go all over the board in pricing, but we chose one in the entry level color and edging. Less is more!
Email Mindy Here to get in touch with Barbara our granite gal!
and intro the surprises in the show.......


Our deck proved to be problematic with drainage around the home. We knew we were going to get to its demo and rebuild someday, but not this soon! Down it came, but the new screened-in porch is a ways off! Buying a home "As-is" means "Good luck!" actually. In this case, our AC decided it had maxed out after 16 years. We also decided to replace the same-aged furnace as well. It's a great investment for the home in the long run and we're happy we can enjoy the peace of mind that comes with that purchase as well.
Here's a sneak peek at some of the pretties being added at the end of week 3 as we swing into week 4 (the home stretch!) Keep in mind all these selections were made before we bought the home, so we are thrilled they are coming together just as we had envisioned! Heading into week 4 on day 22 of the project, we're just days away from being nearly finished and move-in ready!


Hall bath: subway tile meets 12"x24" black gray tiles and "Sea Green" walls
The range beast...that's Dan's baby. My microwave is still in the box!


Master vanity: ordered from one of my faves....Overstock.com! I love you Overstock!
Fireplace: I have always wanted to paint a brick fire place. It's a wood burning one, too!
August 25th: We Are Complete....On
the inside!
We got the bulk of
the reno completed in under four weeks, packed, moved over, unpacked, decorated
and then on Day 40 we had the appraiser in to revalue the home in its new
condition for the renovation loan. We're happy to report the home increased in value by 160% in those 40 days! We tell you this because we're passionate about housing and we are confident in our skills in this industry. Mission accomplished!
We've tied up a few loose ends on the inside and here are the pictures below.
We are starting the exterior in September, which will entail a new patio, rear landscaping and final grade, exterior paint, a new front door, stained shutters, and exterior lights.
Can't wait for the home's new look from the curb!
As you'll see, we
have a very vintage, eclectic style. We build and renovate all of our
homes to look they have been around since 1920. Someone who had not been in the home saw the pictures and asked, "Is this in Meridian Kessler or the Bulter Tarkington area?" Exactly the look we go for! Someday we'll live in a
"real" old home, but until then, we just try to make it look like an
aged classic!
-The Kitchen-
*New wall color: "Dapper Tan", Sherwin Williams*


Taking down the wall made a BIG difference. The painted fireplace is our favorite!


It's all new! Layout, cabinets, counters, floors, lights, appliances, paint.


Seeded glass door fronts with puck lights; oil rubbed bronze door pulls; Farmhouse sink with old fashioned faucet
Granite: Juparana Gold Light (although there's no gold in it!)
Want to connect with my granite rep?
Email Mindy Here!
Granite: Juparana Gold Light (although there's no gold in it!)
Want to connect with my granite rep?
Email Mindy Here!


Sink stayed put, but a whole new layout!
PS-I don't like that microwave sitting there! It's getting a new home in the upgraded island...eventually!

Removed the pantry and then did this......


Some of Dan's favorites.....


.......pot filler meets 36" gas range!
My favorites: the antique white, beveled edge, crackled finish subway tile!
and the details......
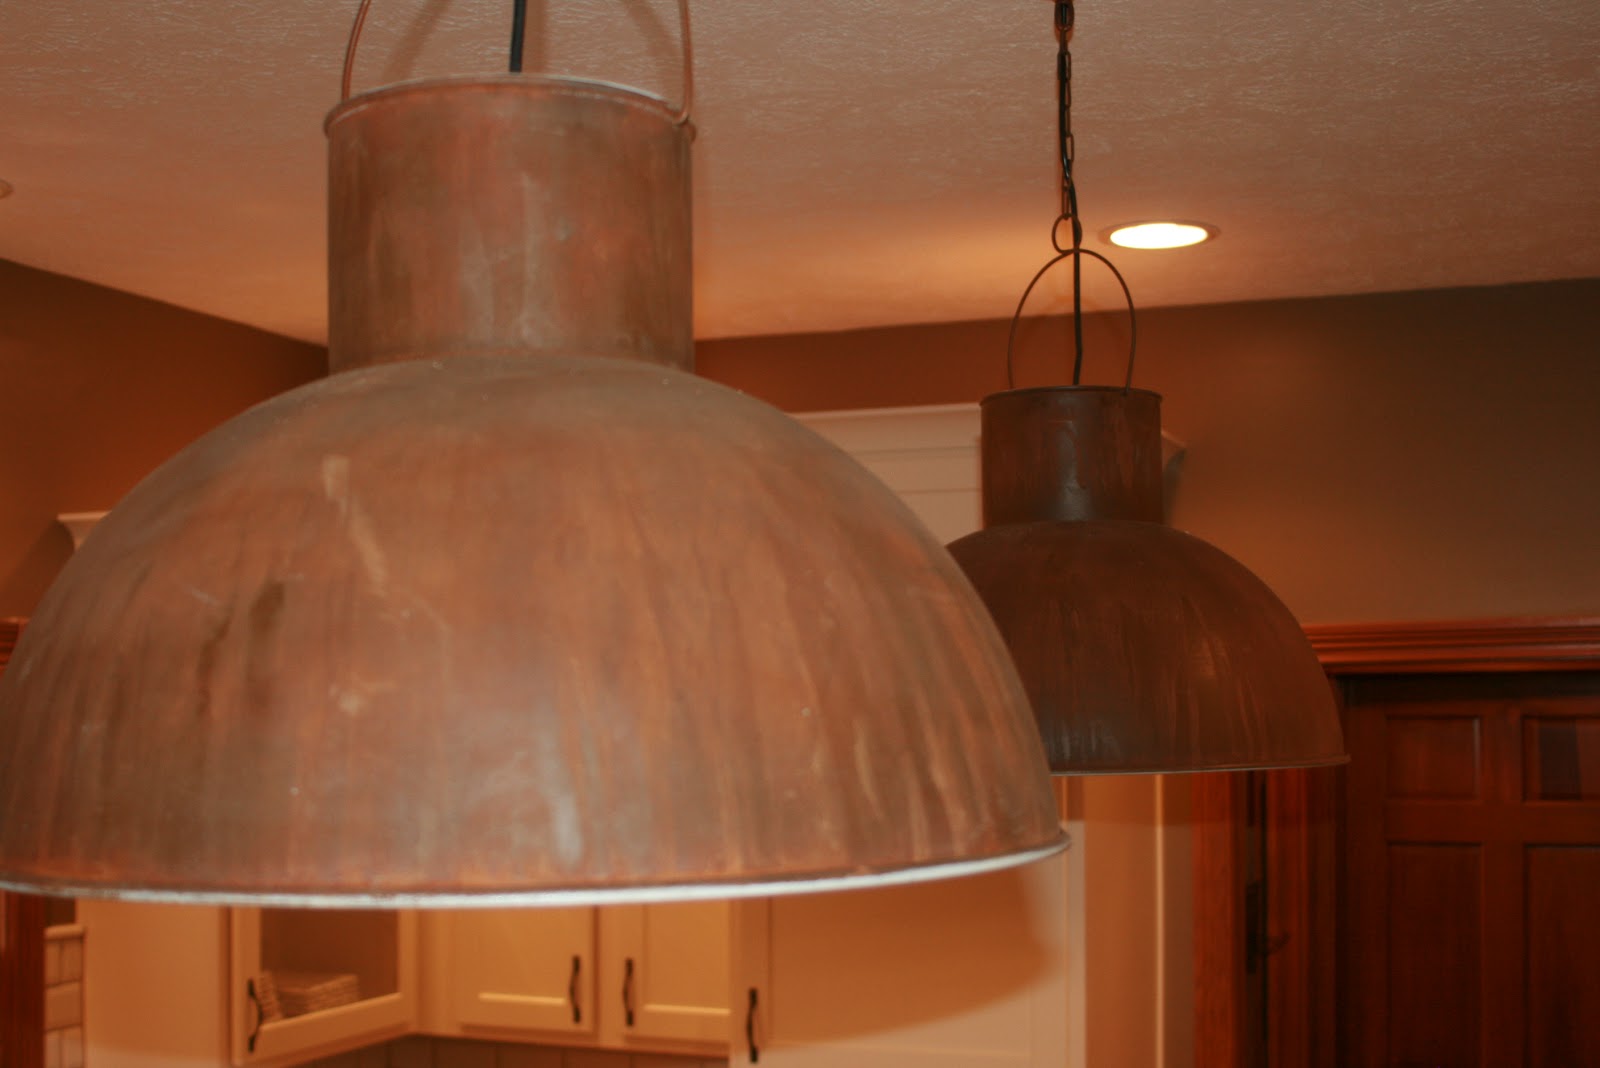
Old or new? Pottery Barn "Mansfield Barn Industrial Pendant" (new!)
Link to this light HERE!


Seeded glass inlays with puck accent lights (so neat at night!)

Cabinet feet (PS-I bought these at Lowes in the furniture building section for $5 each and painted them to match the cabinets!)


Our vintage style: this island was a Craig's List find for $125. It is a former work bench that I repurposed as an island. It's a little wobbly right now, so we're shopping to replace this with something a little more sturdy and relocate the microwave off the counter and (hidden) down on the base of the island....it's on the list!
Cabinets: Aristokraft, Benton door style in painted antique white
Can I connect you with my cabinet designer?
-The Powder Bath-
New Wall Color: "Thunder Gray", Sherwin Williams
No before pictures...just picture an ugly bathroom!

"Spencer" Vanity sink compliments of Home Decorator's
Link to this sink HERE!


"Ledgestone Scroll Arm Chandelier" at Bellacor.com; Link to light HERE!
Mirror: TJ Maxx

Look closely.....Custom built (by Dan!) 1x (pronounced 1 by) wall slats;
painted the same as the wall color
-Family Room-
New Paint Color: "Dapper Tan", Sherwin Williams
Fire Place: Color matched to kitchen cabinets in "Antique White"


TIP: You've got to have a splash of color in every room.....love this bright blue vintage baluster!


Wall removal makes a big difference!
Hardwood floors: 5" hand scraped hickory hardwoods
(LOVE these floors! They wear and clean up so nicely!)
Want to connect with my flooring rep?

A view into the entry. New Paint Color: "Macadamia", Sherwin Williams


another pop of color...expect the unexpected in our home!
-The Dining Room-
New Paint Color: Silver Sage, Restoration Hardware


TIP: take your curtain rods as high as you can to the ceiling
My favorite sheers: "Lil" from Ikea
Shop those curtains HERE!
Light: "Ashley Painted Bronze 5-light Chandelier"
Bellacor.com: Shop the chandelier HERE!

-Character Features Around the Home-


Lourdes 12-light chandelier from Ballard Designs
Shop the light HERE!

Initially, saw this stairway on the internet and it's what got me to want to see the inside of the home!

All new egg shaped oil rubbed bronze door knobs
Overstock.com: Shop these door knobs HERE!

Love these bamboo Roman shades. They are throughout the home and are perfect for our style.
Overstock.com: Shop these shades HERE!
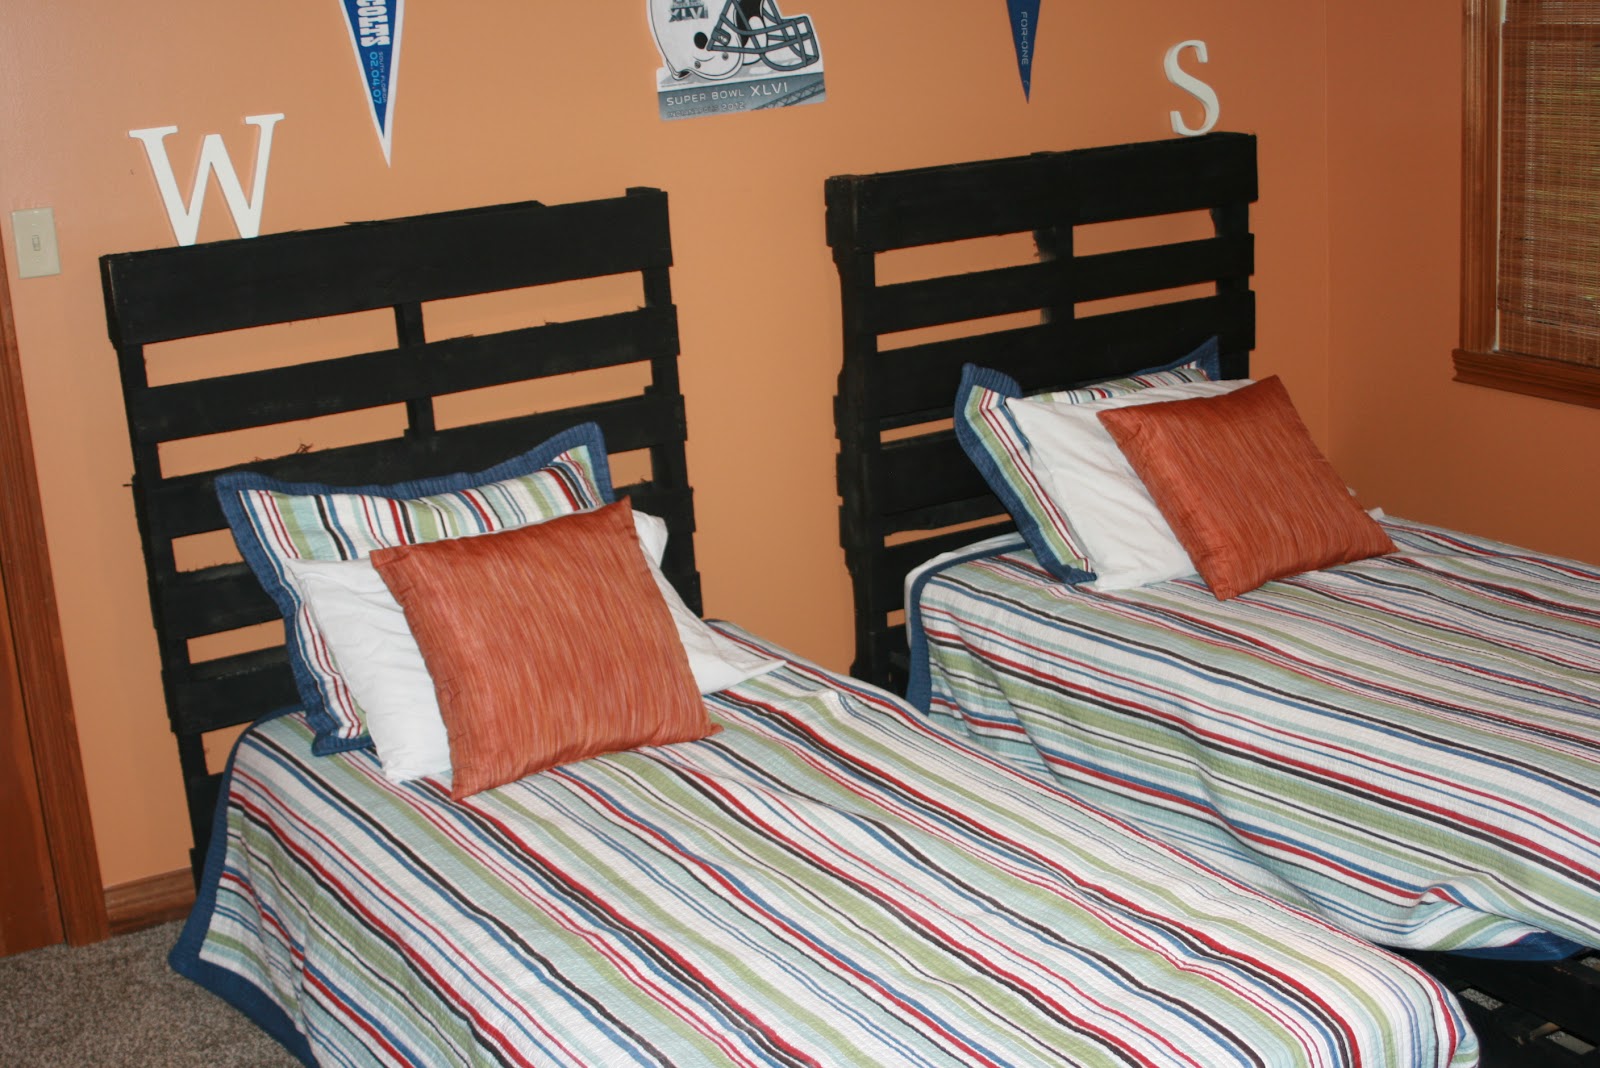
Pallet beds sprayed in black! The boys love them!

One-light matte black pendant (love these for my boys' rooms!)
Bellacor.com: Shop this light HERE!
New Paint color: "Autumnal", Sherwin Williams

The Princess room! We always give her a mini chandelier! This one is from Lowes.
Wall color: "Teaberry", Sherwin Williams
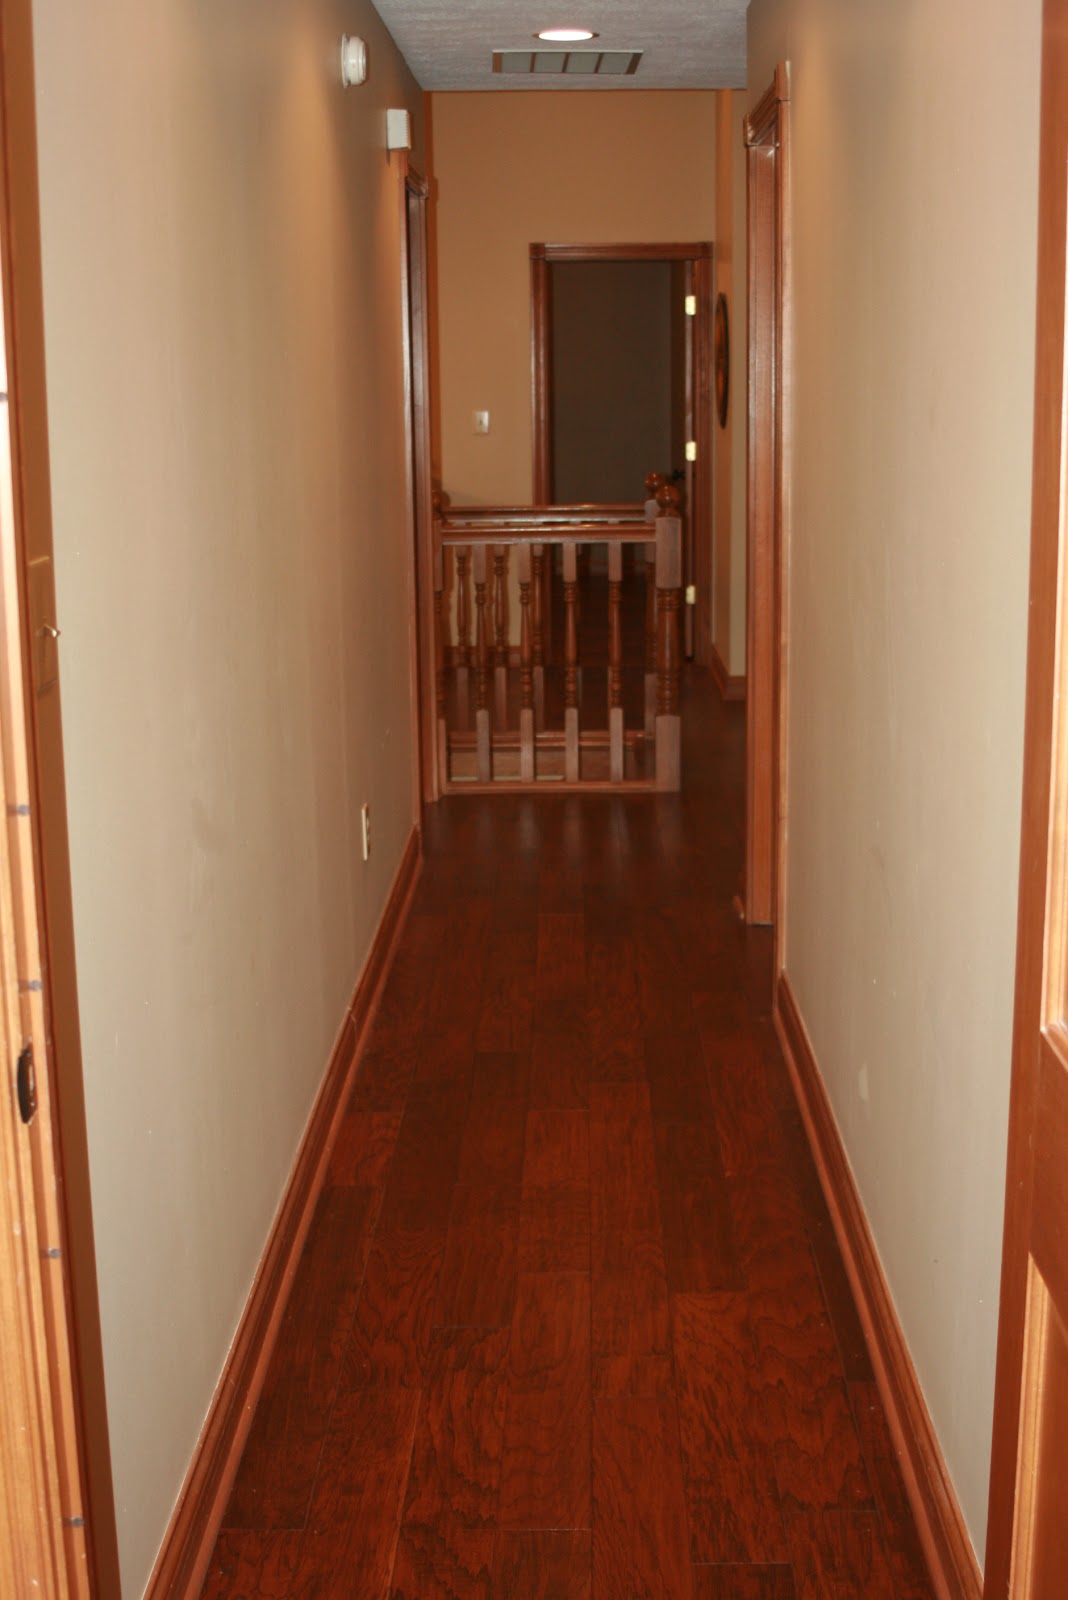

We love hardwood in the hallway!
Floors: 5" hand scraped Hickory Hardwoods
Email Mindy HERE to meet with my flooring rep!


We weren't so sure about the stained wood package when we bought the home and initially we planned to paint it all white. The more we were in the home, the more it grew on us and we decided to work with it. Now, we LOVE the stained trim and it really warms things up! One of my favorites, the beam in the entry!
-Hall Bath-
New Paint Color: "Sea Green" by Restoration Hardware
Again, no before pictures....picture yet another ugly bath!
Again, no before pictures....picture yet another ugly bath!

More subway tiles in gloss white with light gray grout


We took the bath from one single vanity to two pedestal sinks. It enlarged the room, yet gave it more functionality for multiple users at one time.

Cross bar handles!


I did a bath for a client in dark gray floors and white subway tiled walls...fell.in.love!
12" x 24" gray/black tiles look really sharp against the wall color and white bath fixtures!
12" x 24" gray/black tiles look really sharp against the wall color and white bath fixtures!
So far, it's all very easy to clean and keep clean!
-Master Bath-
New Paint Color: "Moderate White", Sherwin Williams


 Love a claw foot tub! I considered buying an authentic, aged tub, but chose to go with a new one built to look old. You can purchase this tub as a package with the feet and faucet in your choice of several different colors.
Vintage Tub and Bath: Shop this tub HERE!


Corner of closet gone....insert claw foot tub!


 A first for DM Irish, carrying the hardwoods into the bathroom....and we LOVE it! Having so much tile on the walls and shower, it would have been tile overload to also have it on the floors. We layered our textures and brought the wood in, giving it a very natural, vintage look. Two thumbs up!


 Vanity and Faucets from Overstock.com!
TIP: the marble tops are high maintenance and very, very finicky.


Used previously in a client's kitchen, we gave it a try in our bathroom. This travertine 3" x 6" tile sits around the entire perimeter at 42" high and below. It's capped with a chair rail and has a pencil insert and square base pieces. The tile took several weeks and lots of hours to complete...it's laid one by one! Those guys have TONS of patience for that tedious work!
Wanting tile in your home on your walls, shower, or floors?
Let me connect you with my tile rep! Email Mindy HERE!
-Exterior Work-


PS-The Irish home is ALWAYS for sale! Contact us here to talk house if this one interests you!
From our family to yours, we thank you for following our summer renovation!
-The Irish Family-

If you're reading this and starting to chomp at the bit to try a renovation too, we have options for you!
New Paint Color: "Moderate White", Sherwin Williams


Jetted tub before; brass fixtures; closet wall joined the tub (see the wall coming directly up to the tub in the bottom right of the top picture?); we deleted that corner closet area and captured it as part of the bathroom instead


This classic light is right at home over the tub....it's another Overstock.com find!


Vintage Tub and Bath: Shop this tub HERE!


Corner of closet gone....insert claw foot tub!


The original shower and toilet were in a separate room just past the tub area. We demo'd that entire room and created one open space instead. We relo'd the water supply lines and then we made the shower the focal point in the bathroom. 78" glass walls line the shower and travertine tile fills in the backdrop and wainscote surround.


A view from the closet, you can see how it used to L back into the bathroom and encase the tub area under the window. We deleted that L and captured it as part of the bath instead.


Before.....After!


TIP: the marble tops are high maintenance and very, very finicky.


Wanting tile in your home on your walls, shower, or floors?
Let me connect you with my tile rep! Email Mindy HERE!
-Exterior Work-

a bare before.....

Pretty much how we found it....

New patio in process.....
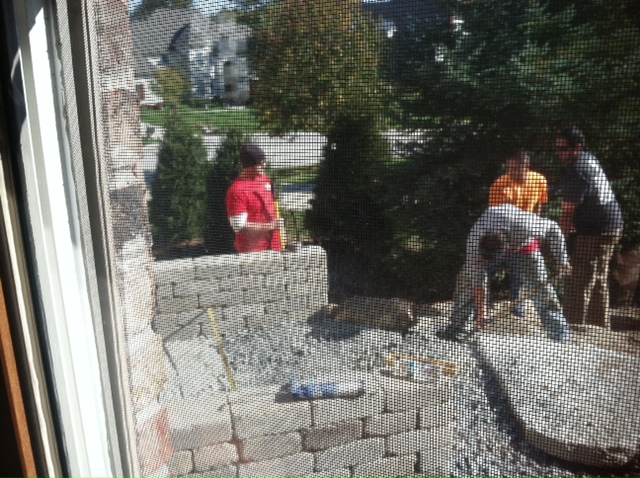
Retaining walls off back step....

Porch and walls coming in....

Little people love the sights too!

In the works.....

and the final finished product in the backyard. I can't wait to add a garden, fresh mulch and potted flowers all around!
and the landscaping when the green is in!
Emails us HERE for our landscaper's name and number!!

The finished product as Irrigation goes in on 3/29/13
New front door, exterior paint, shutters, window boxes, landscape boulders on a raised bed, evergreens on the back surround
the final before and after

PS-The Irish home is ALWAYS for sale! Contact us here to talk house if this one interests you!
From our family to yours, we thank you for following our summer renovation!
-The Irish Family-

If you're reading this and starting to chomp at the bit to try a renovation too, we have options for you!
Email Dan Here to talk about how he as a Realtor can help you search for a home to love on
Email Mindy Here to talk about consulting for general contracting and/or design on your project